
How to Embed a Virtual Photo Booth into Your Website

Virtual Photo Booths - the game-changer in online events
Airmeet, a leading virtual event platform, refers to virtual photo booths as “the game-changer in online events” article Virtual/Hybrid Events & Virtual Photo Booths – A Match Made in Heaven.
Embedding your virtual photo booth into your virtual event platform will give you all the benefits of having a photo booth — interaction, engagement, fun, UGC, branding, social — while also creating a more seamless and integrated experience.
This post includes step-by-step instructions on how to integrate a virtual photobooth gallery — complete with a sample gallery of images and test code for you to try it out yourself!
You’ll be able to paste the code snippet (available later in this article) into one of your site pages to display a gridded photo gallery that looks native to your website.
PixiWeb virtual photo booth and event gallery can be seamlessly integrated into your virtual platform or event website using with easy an “copy & paste” iFrame code snippet.
If you are looking to add an event photo gallery to your website that updates instantly as your audience uploads pictures, you’ve come to the right place. We also have a live photo slideshow that allows you to cycle through all the photos if you want more of a big screen way to display the photos.
This article covers two different methods for embedding PixiWeb galleries into your site, as well as best practices for integrating our interactive “photo booth” uploader to ensure your guests can easily add photos and have fun while doing it!
Why would you want to embed a PixiWeb photo gallery anyway?
Easy! Embedding your gallery makes the overall user experience more seamless.
If your goal is to keep your audience engaged, two things are of the utmost importance:
You need to keep them on your site — so linking out to a separate experience could cause them to leave and not come back.
You need to offer a variety of interactive content — so giving them the ability to both peruse photos from other attendees as well as add their own offers a fun “togetherness element”.
What is an iFrame?
Basically, it is a frame within a frame.
The term iFrame is short for “inline frame”. It is a way to display content from an outside website source within your website. Are you familiar with viewing YouTube videos that are embedded directly into posts and articles online? That is one of the most common iFrame examples that you’re likely familiar with.
If you’d like to dig in more on iFrame technology, I suggest checking out this brief article.
How does PixiWeb work when embedded as an iFrame?

Once the PixiWeb photo gallery is embedded in your webpage, your users will be able to navigate through the pictures by scrolling. They’ll also be able to click on them to display a larger preview.
To allow users the opportunity to add new pictures to the gallery, we suggest including a button and a QR code on your gallery page that link to the PixiWeb photo booth uploader feature.
When users take pictures or upload them from their devices, the embedded gallery will auto-refresh to display the newest photos at the top.
More info on how to properly set up the button linking and QR code coming below.
Let’s get started!
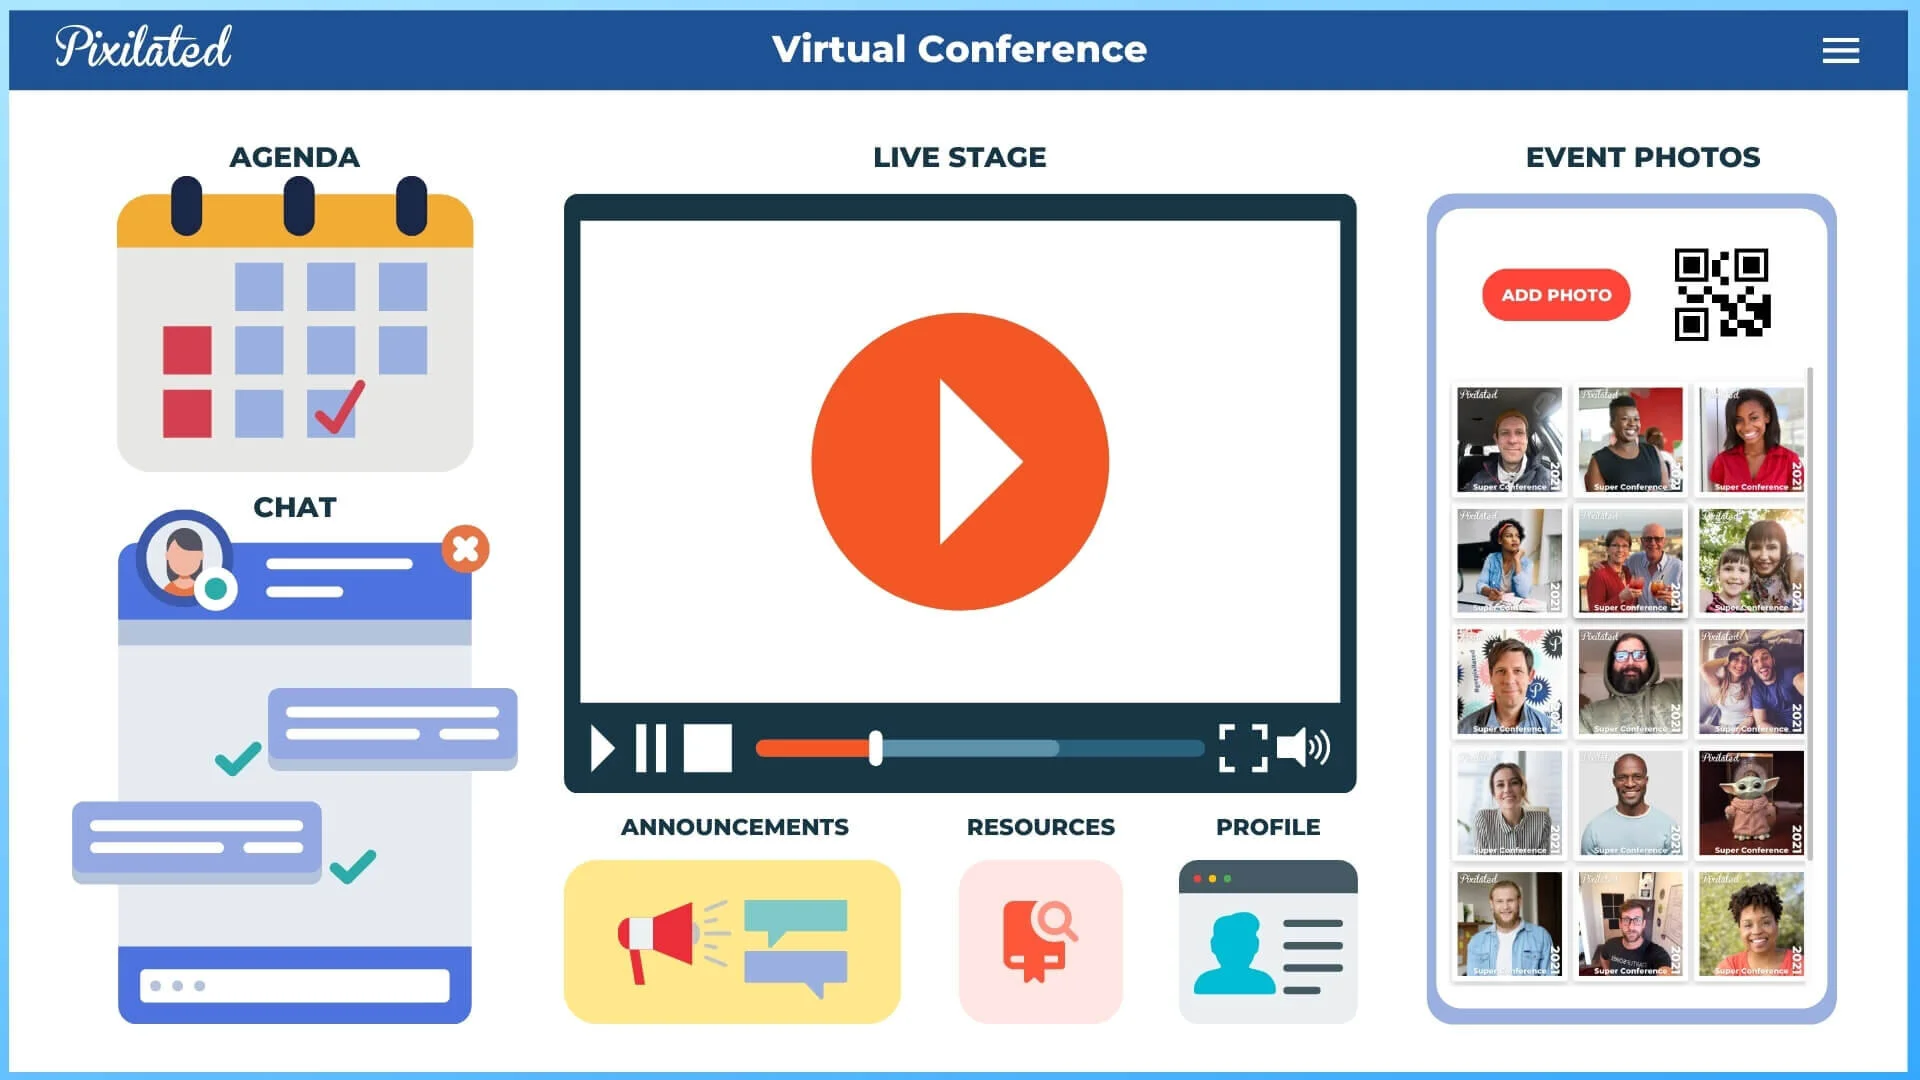
It is important to understand the components of an online photo booth and how it works. The virtual photo booth interface can be used to crowdsource event photos from online attendees that can instantaneously be posted to the event photo gallery displayed within your virtual platform.

Screenshot of vFairs Virtual Event Lobby linking to PixiWeb Photo Booth and Photo Wall from CTA image button and main navigation menu.

Screenshot of PixiWeb photo gallery embedded in a webpage on vFairs Virtual Event Platform.
The components of an integrated virtual photo booth:
The Embedded Photo Gallery
The Virtual Photo Booth Landing Page and Uploader
The Link to the Photo Booth Landing Page
The QR Code

The Embedded Photo Gallery
In “embed mode”, a PixiWeb photo gallery can be configured to be iframed into an external website by eliminating some of the elements that would typically exist when PixiWeb is deployed as a standalone microsite. To prepare the gallery to be embedded as an iframe, we remove the site logo, the “Home” button, and the “Add Photo” button that normally show up in a standard PixiWeb online photo gallery.
By removing these elements, it optimizes the page to be embedded into your wesbite without contrasting graphics or redundant features and functions. For instance, most webpages already have a logo, a navigation menu, and native button styles,. Therefore, bringing in those elements wouldn’t make much sense and could add confusion for users. Stripping down the gallery to a simple grid of photos creates a clean, user-friendly interface that is easy to place into any virtual event platform.
The Virtual Photo Booth Landing Page and Uploader
The PixiWeb landing page and uploader tool are standalone webpages that exist outside of the virtual event platform and are used as the interface by which virtual event attendees take and upload photos that will be displayed in the embedded photo gallery.
The landing page has a short description of how the tool works, including instructions on how to add photos. Once the user clicks the “Let’s get started” button on the landing page, she is directed to the uploader tool which allows her to take a photo or to add an existing picture from her device. After the user submits her photo, it will instantly be uploaded and viewable in the embedded PixiWeb gallery!
The Link to the Photo Booth Landing Page
With every embedded gallery, we also provide our clients with a shortened URL that points to the landing page described above. This URL should be pointed to from within the virtual event platform, ideally in a way that is easy for users to find and access. For instance, it can be linked to from a button, a navigation menu, a text link, or an image with a call-to-action.
The link should be configured to open the page in a new window so it does not close the window where the virtual event is happening.
The QR Code
A QR code is also provided and is basically just an extension of the link described above. We suggest placing the QR code with a call-to-action near your embedded gallery so users can easily launch the uploader tool on their mobile devices. If most of your users are attending the event on a desktop computer, using their mobile device will not remove them from the event and, as an added bonus, mobile devices typically have better camera quality and more accessibility to the users’ photos!
How it all works
Once the PixiWeb photo gallery is embedded in your webpage, your users will be able to navigate through the pictures by scrolling. They’ll also be able to click on them to display a larger preview.
To allow users the opportunity to add new pictures to the gallery, you’ll include a button (or other link) and the QR code on your gallery page that link to the PixiWeb landing page and photo booth uploader tool.
When users take pictures or upload them from their devices, the embedded gallery will auto-refresh to display the newest photos at the top.
Test iFrame Code for Sample Gallery
There are two methods for embedding your gallery depending on the layout of your event website.
Below, we offer sample iframe code, a sample landing page URL, and a sample QR code (for said URL) that you can use to test out how the embedded gallery will look and function when integrated into your virtual event platform.
Method One: Column Gallery Display
The first method we call “Column Gallery Display”.
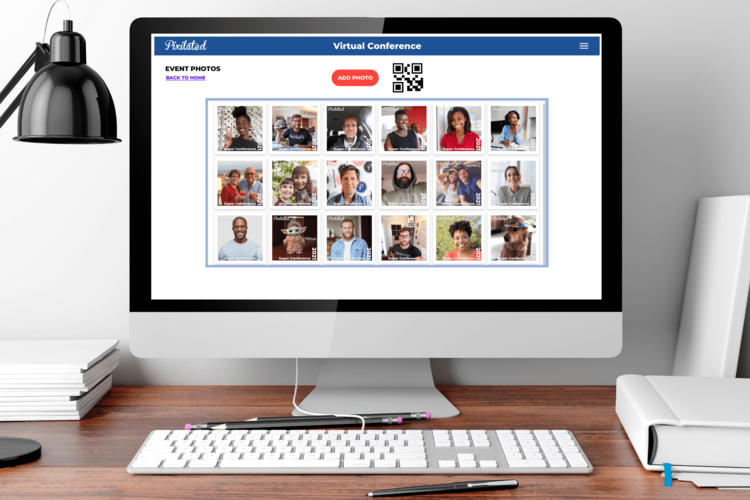
Column Gallery Display works best when you want to display the gallery alongside other content on the same page — usually this type of site layout has a dashboard-style, everything-in-one-place user interface. In this mode, we typically embed a 3-column photo grid that can be aligned to the left, right, or center of the page.
See mockup below of a right-aligned gallery.
Here is the iframe embed code you can use for the photo gallery. You will likely need to tweak the height and width, and will probably need to show a different size view on mobile.
Sample iframe code (Method One):
<iframe src="https://photo.pixilated.com/campaign/pixilated-super-conference-2021-demo-85e2b29c-6582-11eb-ae93-0242ac130002/gallery" style="border:0px #ffffff none;" name="myiFrame" scrolling="yes" frameborder="0" marginheight="0px" marginwidth="0px" height= 650px" width="375px" allowfullscreen></iframe>
Sample URL to use for button link that allows a users to add a photo:
https://photo.pixilated.com/campaign/pixilated-super-conference-2021-demo-85e2b29c-6582-11eb-ae93-0242ac130002
QR Code that matches the URL above so users can easily launch the experience on mobile without leaving your website:

Method Two: Full-Page Gallery Display
The second method we call “Full-Page Gallery Display”.
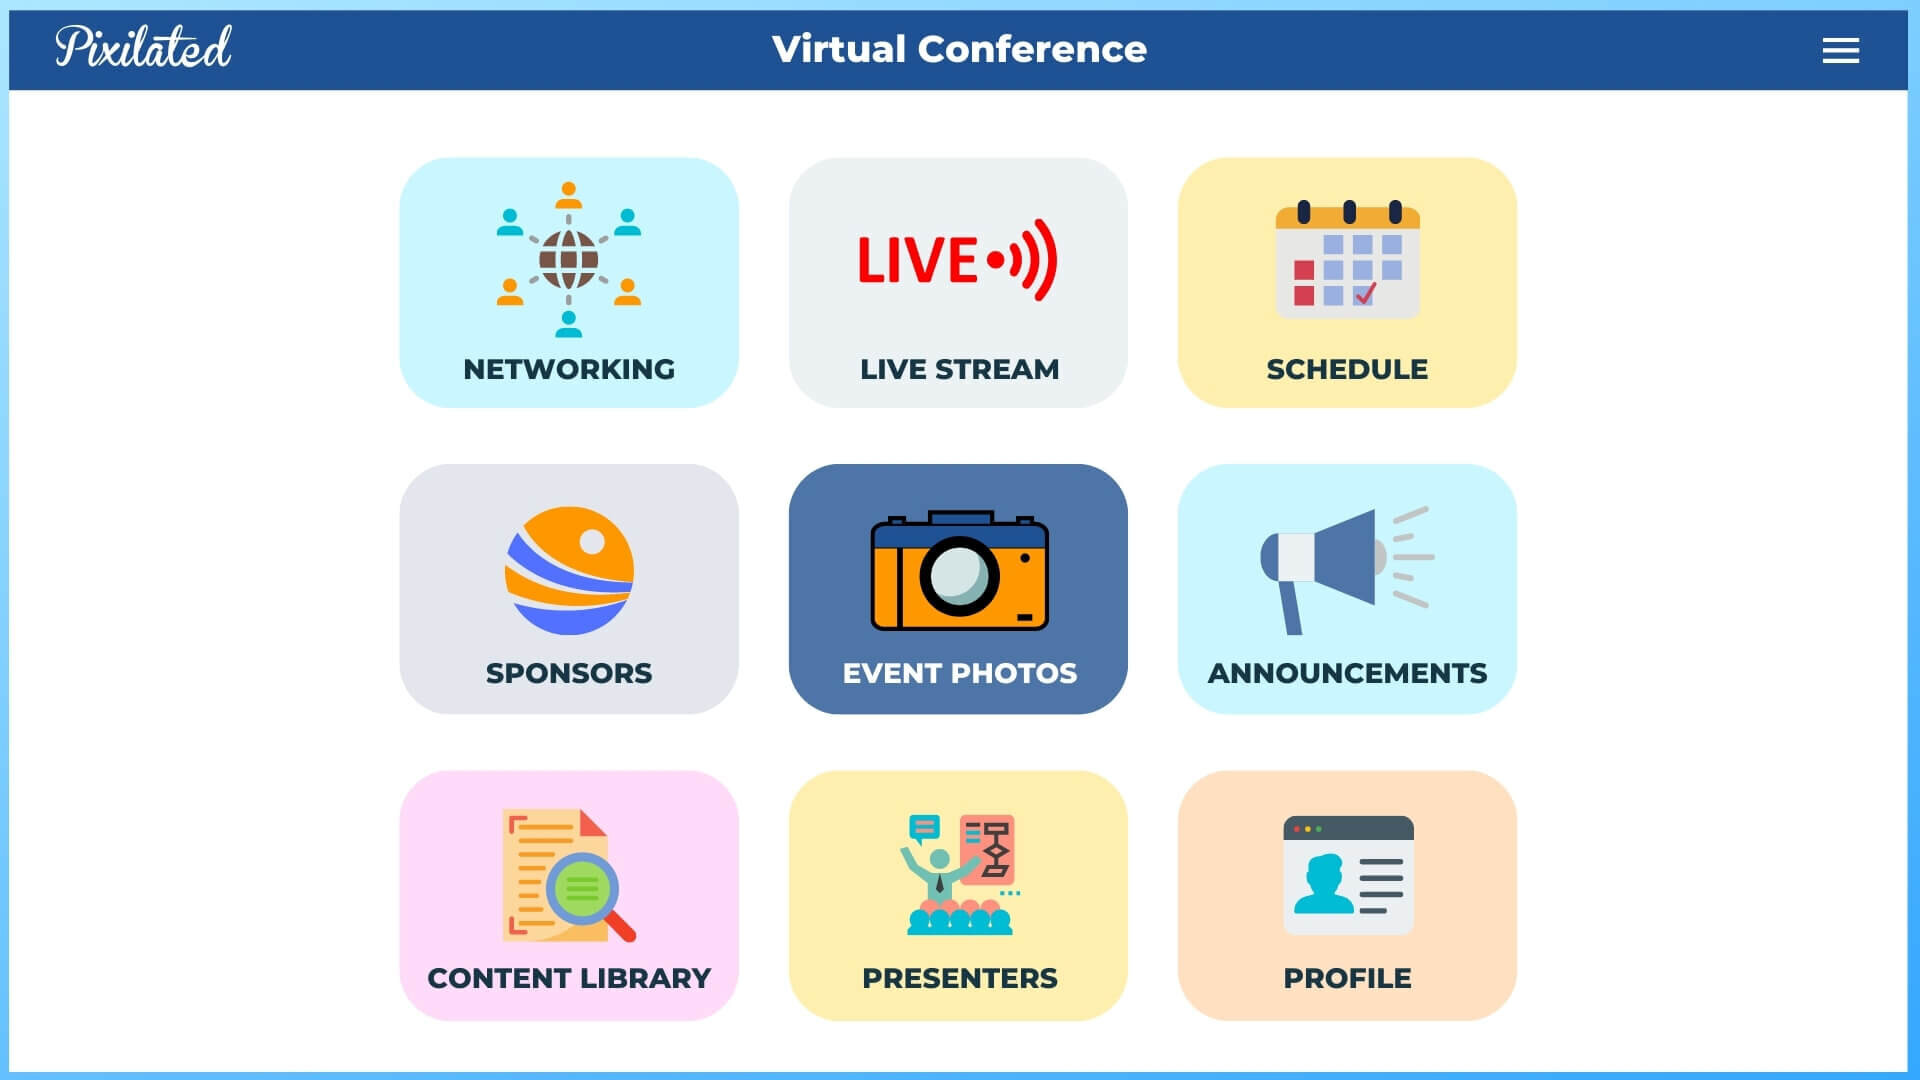
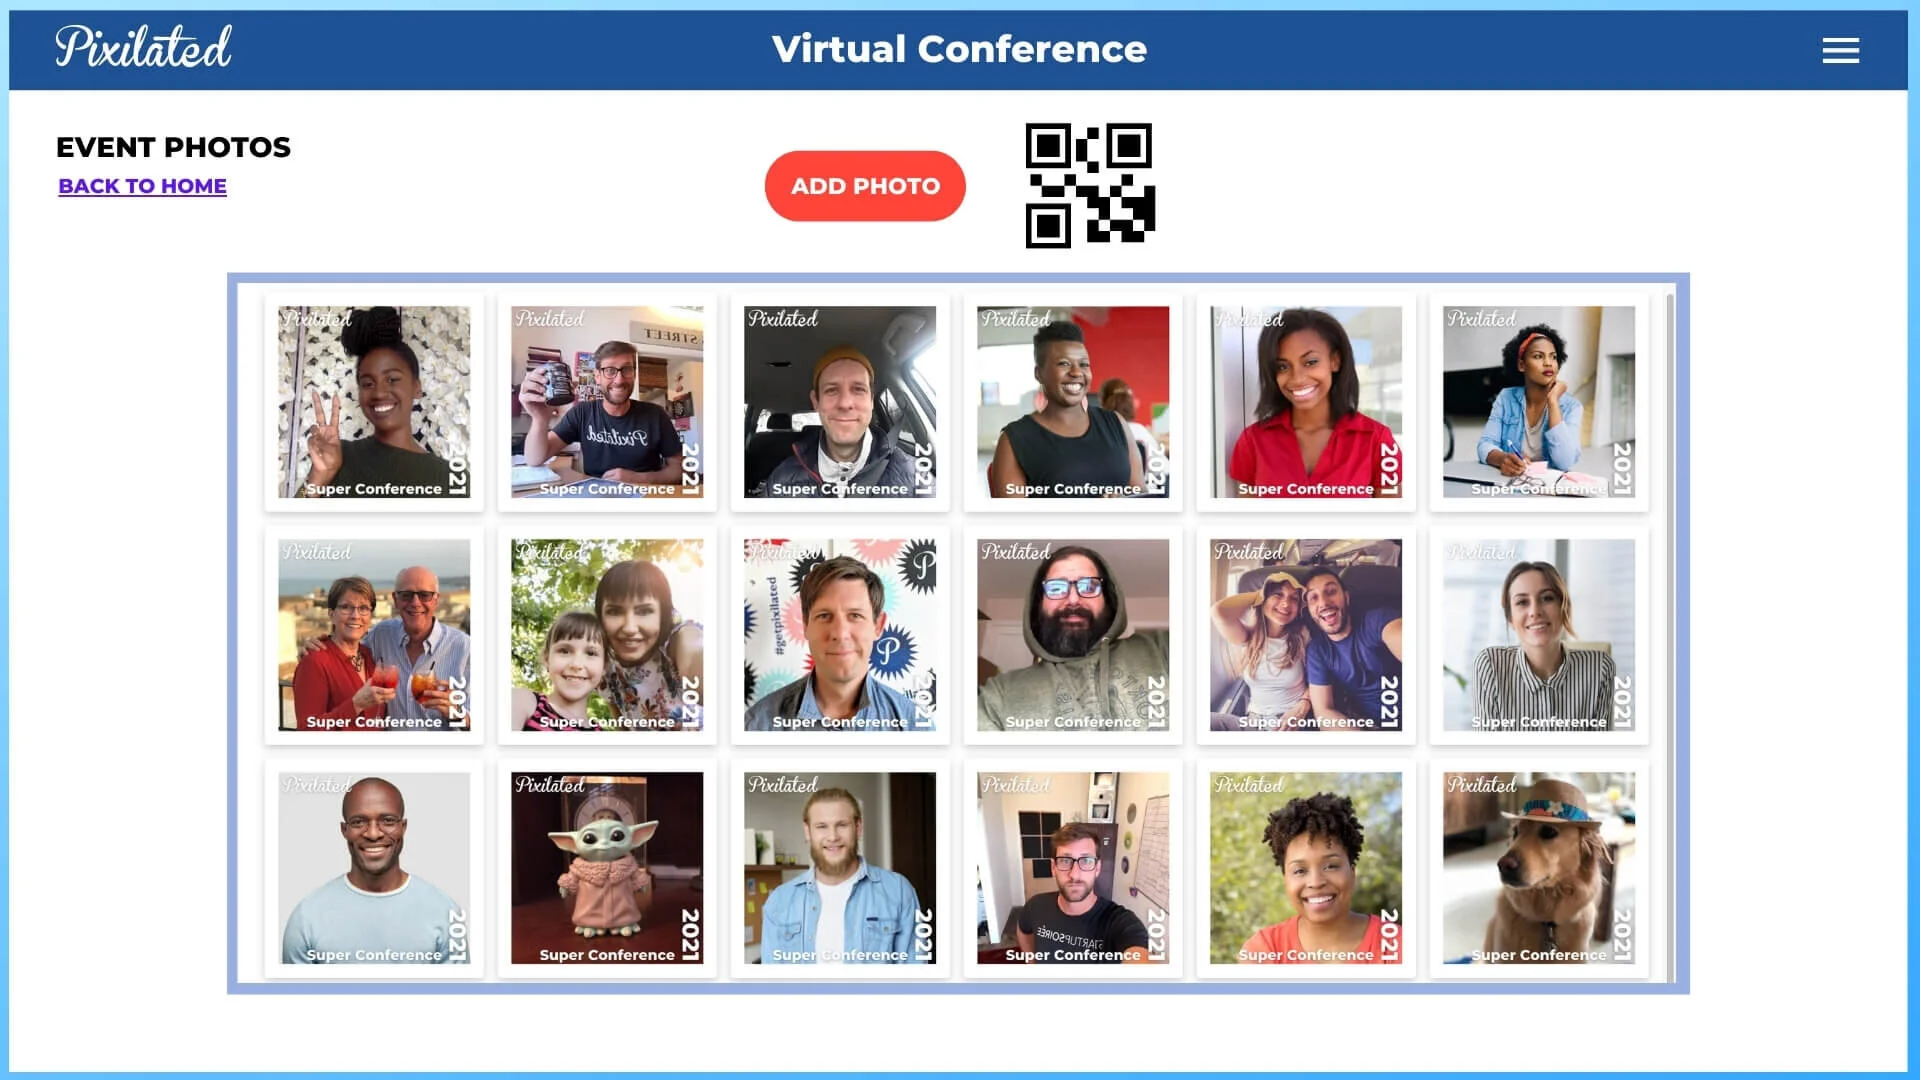
Full-Page Gallery Display works well for event sites that have a simple homepage “hub” linking out to subpages that contain features and varying types of content. From the homepage, we suggest linking out to a separate subpage dedicated to the PixiWeb event photo gallery. In this mode, we typically embed a 6-column photo grid that is center aligned and full page width.
See mockup below of a homepage “hub” (Photo 1) and full-page embedded gallery (Photo 2). In the example below, when the user clicks on “EVENT PHOTOS” from the homepage, she will click through to the photo gallery page.
Here is the iframe embed code you can use for the photo gallery. You will likely need to tweak the height and width, and will probably need to show a different size view on mobile.
Sample iframe code (Method Two):
<iframe src="https://photo.pixilated.com/campaign/pixilated-super-conference-2021-demo-85e2b29c-6582-11eb-ae93-0242ac130002/gallery" style="border:0px #ffffff none;" name="myiFrame" scrolling="yes" frameborder="0" marginheight="0px" marginwidth="0px" height= 590px" width="1175px" allowfullscreen></iframe>
Sample URL to use for button link that allows a users to add a photo:
https://photo.pixilated.com/campaign/pixilated-super-conference-2021-demo-85e2b29c-6582-11eb-ae93-0242ac130002
QR Code that matches the URL above so users can easily launch the experience on mobile without leaving your website:

5 easy steps to embed PixiWeb into your site
Copy the iframe code for the gallery page
On your designated webpage where you want the gallery to appear, paste the code and save!
Adjacent to the gallery, we suggest adding an “Add Photo” button that opens in a new tab/window and having it link to the uploader page.
Near the button, we suggest adding a QR code that goes to the same link as the button. This will allow users to launch the uploader from their phone without ever leaving your website!
Note:
If you have created a campaign in your PixiWeb account, set Campaign Type to “Embed Mode” and it will generate the iframe code for you, in additiona to the campaign url and qr code.
If you are just here to test it out, you can use the sample code, url and qr code above.